
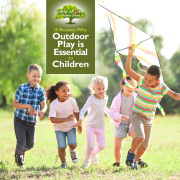

 Outdoor play is one of the truly magical elements of any healthy, fun-filled childhood. At the very least, it gives children the chance for some freedom, fresh air, and adventures that simply aren’t possible indoors. In today’s technological age of electronic screens, however, it’s also something that children have been doing less and less of over the generations. That’s a shame, when you think about it, not least because outdoor play is immense fun and incredibly beneficial to children. In light of this, today’s post explores 18 Reasons Why Outdoor Play is Essential to Children — of all ages. Take a look and see why outdoor play is so good for little ones.
Opportunities for Unique Adventures
 We mentioned it in our introduction — playing outdoors provides children with wonderful opportunities for real adventures! Whether it’s exploring The Great Outdoors on a family ramble, climbing on playground equipment with friends, embarking on a make-believe quest with the family dog, or making a den with siblings, there are no limits to what’s possible with outdoor play. Indeed, the adventures that are possible through outdoor play are only limited by a child’s imagination! Speaking of which…
Outdoor Play Boosts Creativity
Children are naturally inventive, especially when they play and create. Outdoor play opens up a myriad of new opportunities for them to use their imaginations, generate ideas, build, and create. Whether building a den, inventing new games, role-playing, or crafting things from natural objects, outdoor play naturally boosts children’s imaginations and creative skills.
Outdoor Play is Pure Fun!
 Let’s not forget, too, that playing outdoors is huge fun — and that’s important. Simply put, playing outdoors and giving children space to run around will make them happy. And there’s not much in life that’s more important than a child’s happiness — it’s an essential part of any magical childhood.
Children Learn So Much Through Outdoor Play
It’s common knowledge that young children learn best through play. By playing outdoors, children are exposed to new and virtually infinite opportunities to learn new things. Whether it’s new facts about the world or about themselves, these new learnings are gold dust that will enrich any child.
Outdoor Play Encourages New Skills
 Outdoor play lends itself to the learning of new skills. With such a varied array of activities possible, children will naturally attempt new things, and each of these can be an opportunity to extend their skills. Physical skills might include tying knots, building dens with branches, playing ball games, climbing, racing, and so on. In addition, children will learn softer skills like teamwork, cooperation, strategy, critical thinking, leadership, and role play. What’s more, all of this will happen instinctively — such is the power of outdoor play.
Outdoors is a Feast for the Senses
Playing outdoors is a potential feast for children’s senses (under adult supervision, of course). The outdoor environment is rich in textures, colours, smells, and scents that will stimulate children’s senses — taste too, under close adult supervision. Brightly coloured flowers that smell incredible, the fascinating textures of tree bark, soft moss growing on rocks, the delicious flavour of an apple, and multicoloured rainbows spanning the sky are just a few of the many things that’ll stimulate the senses of a child outdoors. Such stimulation teaches children about the world, about nature, and encourages new connections in children’s developing brains.
Improved Spatial Awareness
Next, we come to the proprioception and vestibular senses, which control and coordinate the position of the body through movement, spatial orientation, and the sensing of gravity — even when the eyes are closed. These additional, hidden senses are also stimulated by the many activities experienced during outdoor play, allowing children to fine-tune their spatial awareness, physical movements, coordination, and the adjustments of force. Such skills will allow them to move optimally and stay safer from potential harm.
Outdoor Play Boosts Friendships
 Children who regularly play outdoors will inevitably meet other children and encounter new dynamics. These will help them make new social connections, and immersive activities will deepen existing friendships. Playing outdoors is a great way, therefore, to strengthen and extend a child’s social circle, and boost social skills like teamwork, leadership, cooperation, brain storming, and so on.
Enhanced Communication Skills
All this outdoor play, which is seldom undertaken without other friends, siblings, or family members, is a natural conduit for improving communication skills. Group-based activities and multi-player outdoor games require clear communication skills, which children will naturally learn while having the best fun.
Outdoor Play Supports the EYFS
The Early Years Foundation Stage (EYFS) curriculum is, importantly, another beneficiary when children play outdoors. Several prime and key areas of the EYFS are supported when children do so. Examples include Physical Development, Communication & Language, Understanding the World, Personal, Social & Emotional Development and even Mathematics — each of these is boosted in children who play outdoors.
Outdoor Play Boosts Children Physically
 The often high-octane activities associated with outdoor play will also help children boost strength, fitness, motor, and coordination skills. By exposing themselves to different terrains, environments, tasks, games, and equipment outdoors, they will increase the variety of motor skills they need to accomplish activities. Running, jumping, hopping, constructing, chasing, and climbing will all help improve them physically, in so many ways that may not be possible indoors. What’s more, such things will help children protect themselves from harm, as well as empower them physically.
Proximity to Nature is Good for Children
Many studies have shown that being close to nature is immensely beneficial to children and adults alike. Indeed, the benefits of nature are profound and numerous to children (click the bold link to read our stand-alone article on the topic). In short, close proximity to nature boosts mental well-being, reduces anxiety, fights depression, and even improves academic grades. Incredibly, even just a view of a natural open space has been proven to improve children’s educational performance. Just a few minutes spent closer to nature can also help children reset following a time of stress.
Outdoor Play Helps Children Assess Risk
 Playing outdoors, with adult oversight, is the perfect opportunity for children to begin learning how to assess risk. Whether it’s safely navigating outdoor play equipment, stepping over undulating ground, climbing a tree, or playing fast-paced ball games, children will soon learn when and how they need to assess possible risks. It’s a skill that, once learned, will keep them safer from harm, so is incredibly important.
Outdoor Play is in the Real World
Outdoor play takes children back to the all-important basics, away from electronic screens and the dangers of a more sedentary lifestyle. Outdoors, they’re deeply involved in activities, immersing themselves fully into real-life games and scenarios. That’s a far cry from sitting and looking at electronic TVs, tablets, smartphones and computers. And, with the UK recently debating whether it would be better to ban mobiles in schools and social media for children under 16, this is highly relevant today.
Outdoor Play Boosts Confidence
By playing outdoors, children get to enjoy greater movement, more independence, and an element of freedom that’s simply not possible indoors. By giving children such opportunities, they will naturally take charge of activities a little more, learn to make decisions for themselves, and add deeper levels of sophistication to their relationships with friends. Such opportunities will naturally boost independence, self-confidence, and self-esteem — essential tools to help them thrive as they get older.
Outdoor Play Helps Ready Under-5s for School
 All these new skills and enhancements make under-5s well-equipped when the time comes to leave preschool and begin school. Through outdoor play, they’ll have greater independence, confidence, communication and social skills, and physical skills, to name just a few. What a great way to help them hit the ground running from the moment they begin school!
Outdoor Play Widens Children’s Horizons
There are few activities that will better expose children to the wider world than outdoor play. Through it, they’ll discover new places, new facts, new skills, new activities, and broaden their understanding of our beautiful planet. As well as having fun and discovering new experiences, their eyes will be truly opened to the enormous scope of what’s out there if they care to explore. That widening of horizons can profoundly benefit their lives and future potential.
Outdoor Play Prepares Children for Life
 All in all, outdoor play prepares children for life. Through greater independence, better confidence, raised self-esteem, and new tools, skills and knowledge at their disposal, children can go forward with new vigour and thrive. Such is the power of outdoor play.
So, with spring not far away at the time of writing, it’s a great time to plan some outdoor play for your children — under adult supervision, of course. Whether it’s a trip to the playground or a hike in the wilds of the countryside, outdoor play will benefit them in incredible ways. And it’s so much fun! What’s not to like?
Little Acorns Nursery, Hindley Green
A Weekday Childcare Service Near Wigan
 At Little Acorns Nursery, Hindley Green, we understand the benefits of outdoor play and nature to children. With that in mind, children under our care get to experience rich and stimulating opportunities for outdoor play and proximity to nature. The childcare setting is fortunate to have extensive grounds, where children can enjoy playing on a wide range of equipment or explore nature zones.
Little Acorns Nursery supports free childcare hours for eligible families. This includes eligible children as young as 9 months old. To apply for a place, find out more, arrange a nursery tour, or get in touch, please get started below:
Little Acorns Nursery is located in Hindley Green, near Wigan. Families living nearby in Bickershaw, Leigh, Atherton, Westhoughton, Ince-in-Makerfield, Platt Bridge, Tyldesley, Bolton and Greater Manchester may also find it a convenient choice.


 Once summer has gone, observant children will begin to notice a change in the behaviour of wild birds. Many of our feathered friends will begin migrating to warmer locations, evidenced by often noisy flocks heading south overhead. Those that stay in the UK, like robins and blackbirds, will soon find that all the wild berries, seeds, and grubs have been eaten — food becomes scarce as remaining supplies disappear in the run-up to winter. In view of this, wild birds will become more reliant on good-natured humans to ensure they still have enough food to eat over the colder months.
 This simple type of bird feeder is quick and easy to make. Simply thread string or gardening twine through the outer husks of unroasted monkey nuts to form a garland. Holes can be made in the monkey nut husks using a small matchstick. Alternatively, if using something sharp like a darning needle, an adult should make the holes so that little ones don’t hurt themselves. Once a whole chain of monkey nuts is in line along the string, the ends can be tied between twigs, branches, or bushes, so the nuts dangle in a stretched arc. Blue tits will love pecking at the husks to get to the nuts inside!
 Apple bird feeders are by far the most simple to accomplish. In essence, they are simply an apple either dangling from a tree, bush, or fence, or are held high in the air from underneath by a vertical bamboo cane pushed into the ground. Whether the apple is dangled by string or held aloft by a cane, it’s best to expose some of the apple by removing some of the outer skin, so birds have a weak spot to begin feeding on. Check the apple daily to ensure it does not go mouldy; discard if so – mould can be dangerous to birds. (Adults should also supervise* children to keep them safe around hazards and other possible dangers, of course).
 These bird feeders are extra fun because little ones can decorate them! You’ll first need an empty juice or milk carton. With help from an adult, rectangular or arc-shaped flaps should be cut on 3 or 4 sides of the carton, ensuring the bottom of the rectangle or arc is not cut. Crease and fold the flaps out at that lowest point, as shown in our example. The flaps provide a landing platform for birds, as well as access to the inside. That’s where the birdseed will go when the feeder is complete. After painting the exterior with a nice design and leaving it to dry, the carton bird feeder can be suspended by a string. This can be attached at the top, for example, by trapping it with the carton’s lid. Fill with birdseed to the level of the open flaps once suspended in place.


 Pine cone bird feeders are great fun for children! You first need to forage outdoors for a large pine cone. Ideally, it needs to have its many splines open, although that’s not critical. Children should smear peanut† butter all over the pine cone, ensuring it gets pushed into the cone’s many crevices. The whole thing should then be rolled around in a bowl of bird seeds, which will then stick to the sticky covering that was just applied. The completed pine cone bird feeder can then be suspended by string outdoors, somewhere suitable for the birds (usually at least 1.5m off the ground but under the protection of a tree canopy or similar so that feeding birds avoid attack from predators like sparrowhawks).
 Seed cake bird feeders are a firm favourite for children to make. They’ll need some small, empty pots — plastic flowerpots would be perfect. With adult help, attach a string or garden twine to the base of the pot(s), for example, by threading it through the flowerpot drainage holes, and secure with a knot. Ensure that most of the string is left on the outside of the pot. Next children will need to mix bird seed in a suitable bowl with something to bind it together. For this part, adults will need to help by melting some lard† or beef suet† on the stove for children. They will then need to supervise to ensure it’s cool enough before children have access to it. Once mixed with bird seeds into a thick, gloopy mixture, children should fill the pots. A wooden spoon is perfect for the purpose. Once the mixture has cooled and set, the filled pots can then be turned upside down and dangled somewhere suitable for birds outdoors, for example, suspended high above the ground from a tree branch or on the side of a bush.
 There are lots of different seed mixes available and each will attract a different range of birds. Our personal favourites are sunflower hearts, which are available in most supermarkets, garden centres, and online, and robin peanut cakes, which are similarly available. We’ve found them both to be popular food sources, attracting birds like robins, blue tits, great tits, blackbirds, doves, pigeons, nuthatches, starlings, and more. A small amount of grated cheddar cheese is also very popular, especially amongst robins and blackbirds, but must not be allowed to go mouldy (mouldy cheeses are dangerous for birds). We suggest avoiding mealworms, as each represents a little life lost unnecessarily. In any case, we love

 Following May’s
  Children will need some leaves for these ‘leaf art’ activities. We suggest they collect a wide selection of shapes, sizes, and varieties, so they have the flexibility to undertake any of the leaf art activities below. Our
  Whether fresh, dried, or pressed (see below), leaf collages can be used to make wonderful pictures and designs. With a little imagination, leaves can suddenly resemble little trees and landscapes, or be combined into formations that depict a flower head or a graphical design. The accompanying images show a couple of examples to get children’s creative juices flowing.
 One of the most straightforward creative activities with leaves is simply to paint and decorate them with coloured paints. Doing so can create highly attractive groups of leaves that are fun and cheerful to look at. Experiment with flat colours or more intricate decorations such as polka dots, stripes, stars, or zigzags. Glue the finished leaves to paper or card once dry to use them as part of a leaf collage (see above).
 Leaves and small flowers can be dried, flattened, and kept longer by pressing them. Once pressed and dried, they’re like little works of art in themselves and are quite delightful. They can be kept as bookmarks or keepsakes, or used as art and collage components for some of the other leaf activities outlined today.
 Leaf rubbing is a simple yet effective art activity involving leaves. First, simply place a leaf under a sheet of fairly thin paper. Holding the paper still with one hand, children should use their writing hand to rub a crayon, pastel, charcoal stick, or soft pencil lead over the area where the leaf sits, scribbling from left to right in closely aligned lines. A ‘picture’ of the underlying leaf will gradually appear!
 Leaf printing is super-easy and fun for little ones. Find a suitable leaf and, using a broad brush or — better still — paint roller, paint the most textured side of a leaf with a thin layer of paint, ensuring it covers the whole side of the leaf. Then, while the paint is still wet, place the painted side carefully over a sheet of blank paper. Without moving its position, press all parts of the leaf down so the paint makes contact with the underlying paper. Another way to accomplish this is to use a clean roller to ‘roll’ over the leaf so it connects the paint with the paper. Carefully remove the leaf and — hey presto — you should have an image of the leaf structure and texture right there on the paper. Try different leaves, various colours, and overlapping experiments to accomplish different outcomes.
 Instead of painting or using leaves directly, children can also try to depict them with their own paintings and drawings. These are a good way to encourage children to focus on getting the shape and details correct, fine-tune hand-eye coordination, and bolster technical mark-making skills. And, because children are free to paint or draw however they like, they can let their imaginations run riot and perhaps invent their own leaf shapes, leaf patterns, and natural worlds on paper.
 Children can use some of the creative skills they’ve learnt in the activities above to make greeting cards that feature their leaf art. For example, they can forage for heart-shaped leaves and paint them cerise pink to use as part of a simple Valentine’s Day or Mother’s Day greeting card. More general greeting cards for other special occasions can also be accomplished using leaves and dried flowers — for example, arranged to depict a leaf or dried ‘bouquet’ on a card sent for a birthday.
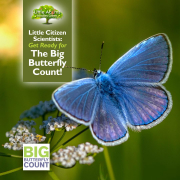

 Calling all children and their families — people of all ages are needed this July and August for the world’s biggest wildlife survey — the Big Butterfly Count! So, whether you’re a child or an adult, you can play your part. This is a great activity for under-fives too as it’ll be fun, educational, and incredibly worthwhile. What’s more, they’ll become little citizen scientists by taking part. The nature-based activity takes as little as just 15 minutes and costs nothing at all. Children don’t need any special abilities other than a little patience and good observation — both great skills for them to practise. Let’s take a look and see what the Big Butterfly Count is all about and how children can take part this year.
 The Big Butterfly Count is a nature survey that anyone can take part in during July and August each year. For 2025, it takes place from Friday the 18th of July to Sunday the 10th of August, a period in which temperatures are usually warm and butterfly populations are likely to peak. In essence, all that is required is for butterflies to be counted during a 15-minute period (more detail follows later in this guide). The survey event is open to everyone and, indeed, the more people who take part, the better. So, if you, your child, your family, or your friends want to play a part in protecting butterflies and nature as a whole, please get involved.
 The populations of butterflies can be used as a barometer for the health of pollinator numbers and nature as a whole. With some butterfly species already disappearing from our gardens and countryside and others nearing extinction, there is no time to lose. Only by identifying the issues can we, as a nation, begin to reverse some of the decline. By reversing it, it will be good for butterflies, good for other pollinators like bees, good for nature as a whole — and good for humans too! After all, without pollinators, the supply of foods like cereals, fruit, vegetables and legumes would start to run out. So, taking part in the Big Butterfly Count is extremely worthwhile and we urge little ones and their families to take part.
 First, ensure you have downloaded and printed out
 Choose a spot for your butterfly survey. It should be somewhere outside where butterflies are most likely to be seen. Sunny, sheltered spots are good, particularly where a variety of different sizes and types of flowers or blossoms are in bloom.
 Sometime in the period from Friday the 18th of July to Sunday the 10th of August, you/your child should spend 15 minutes making a note of how many of each type of butterfly you can see. Concentrate only on the species included in the event organiser’s reference from Step 1. You must count how many of each single species you see at the same time. So, if you see three Painted Ladies at the same time, then record that as 3. However, if you see one Painted Lady on three separate occasions during the 15 minutes, that would only count as 1 — otherwise, it could simply be the same butterfly revisiting.
 Did You Know?
 Nature and outdoor play feature significantly in children’s time at
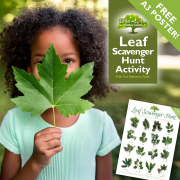
")
 Wherever you look, nature’s flowers and trees are bursting with life during spring and summer. This got us thinking about the many nature-based activities that are possible for children and under-5s to enjoy at this time of year — under appropriate supervision, of course. One of them is a simple leaf-hunting activity that’ll get little ones exploring the outdoors, enjoying the fresh air, having some fun, and learning about the natural world. With this in mind, we’ve put together a Leaf Scavenger Hunt reference poster for children and families. It can serve as inspiration for some common leaves to look out for during the warmer months of the year. The poster is free to download, right here today, and highlights 16 different types of leaves. Included are oak, sycamore, beech, lime and many more. Children will probably be familiar with some — especially oak leaves with their wonderful little acorns — while others may be unfamiliar. However, all of our examples were sourced on a single morning’s outing, so it’s feasible to find all 16 kinds with a bit of eagle-eyed persistence! So, download the poster for your children, print it out, and explore the outdoors to see how many of the 16 leaf types your little one can find. See if they can identify the differences which make each species of leaf/tree/plant unique — and learn their names if they can. The free identification poster and some help from an adult should help. Have fun out there!
")
 Some of the leaves will be easier to identify than others. For example, Horse Chestnut (a.k.a. ‘conker tree’) leaves are quite distinctive with their fan of multiple sections (see the 2nd row, last image on the right on the poster for our example). In contrast, hazel and lime leaves are quite similar to one another. One easy clue to tell them apart is that lime leaves are slightly shiny, whereas hazel leaves are extremely matt. And, of course, they have very different seeds once those appear (the lime seed clusters are quite beautiful as you can see on the poster in the 3rd row, 2nd image from the right).
 Another interesting factor to point out to children is that some of the leaves come in different colours. Beech leaves, for instance, can be green or deep burgundy, brown or dark purple depending on which variety of beech a child locates. It’s similar for acers, which can be green, yellow, red or a deep purple/maroon. Acers however, are more likely to be found in gardens and parks than in the countryside. Some are a little like miniature sycamores, only rather more delicate and fancy! And, come
  This activity is a great opportunity for children to open their eyes to the natural world. By looking at nature more deeply, they’ll see the finer details that may have been overlooked. Nature is incredibly varied and interesting when you take the time to look closely and discover it properly. It’ll teach children about the natural world, the seasons, the changes in plants and trees at different times of the year, the circle of life, and so much more. Getting out, close to nature, is also incredibly beneficial to children. From busting stress, improving well-being, supporting the EYFS and boosting exercise, to improving concentration and even academic grades,
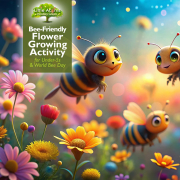

 With World Bee Day arriving on the 20th of May and National Children’s Gardening Week arriving on the 24th, it’s an excellent time for a flower-growing activity for children — including under-fives. More specifically, the growing of bee-friendly flowers — from seeds — will be an excellent way to celebrate World Bee Day and support these adorable little creatures. Bees, butterflies, and other pollinators are incredibly important for the world, being largely responsible for pollinating the crops, including nuts, seeds, fruits and vegetables, that we rely on for food. Yet they are under threat with numbers dwindling severely in recent years. Without bees and other pollinators, the world’s animals, plants, trees, and flowers would be in real danger. Today’s bee-friendly flower-growing activity is therefore an incredibly worthwhile one for children to get involved in. It’s fun, highly educational for little ones, and will help to make the world a better place! Little ones, let’s get growing!
 Unless seeds are available from friends and family or harvests from previous years, parents of under-fives will need to source them. However, that’s easy and can be incredibly inexpensive. Most supermarkets sell seed packets and, if not, there is a whole range of online stores to choose from (
 If children are going with our recommended second option, they will first need to read packets to ensure their timing is right. For seed trays, they can use inexpensive, commercially available seed trays or use smaller options like flower pots. Another free alternative is to use repurposed margarine tubs, yoghurt pots, or similar. Whichever option they choose will need drainage holes added underneath by supervising parents plus a drip tray of some kind. Whether that’s a commercial one or something as simple as a saucer is up to families.
 Once the soil is layered into the seed trays or pots, to a level an inch or so below the top, children can indent the soil/compost for the seeds to go into. Seeds can be manually spaced out into these indents so that, once they grow, the individual plants will be easily separated. We suggest scattering a shallow layer of sieved soil or compost over the seeds once placed into the indents and given a sprinkling of water.
 Children should continue to water the seedlings regularly, when needed, and may also have to thin out any ‘clumps’ or plants that are too close together, otherwise, several plants may get tangled and have to compete with one another unnecessarily.
 Once flowers appear, children can expect pollinators like honey bees, bumblebees, butterflies, and hoverflies to appear. It’s going to be magical for children when that day first arrives! Bees and the other pollinators truly are delightful and adorable. Children should look but not touch*, after all, bees have important work to do!
 This activity will raise awareness of bees and pollinators in children of all ages. It’s not only a wonderful way to introduce children to these adorable creatures, but also a great opportunity to raise awareness of the plight bees and pollinators are facing. They are under severe pressure from habitat loss, global warming, the use of harmful pesticides/weedkillers, pollution, invasive predators, and many other threats that have made their populations plummet in recent years.


")

